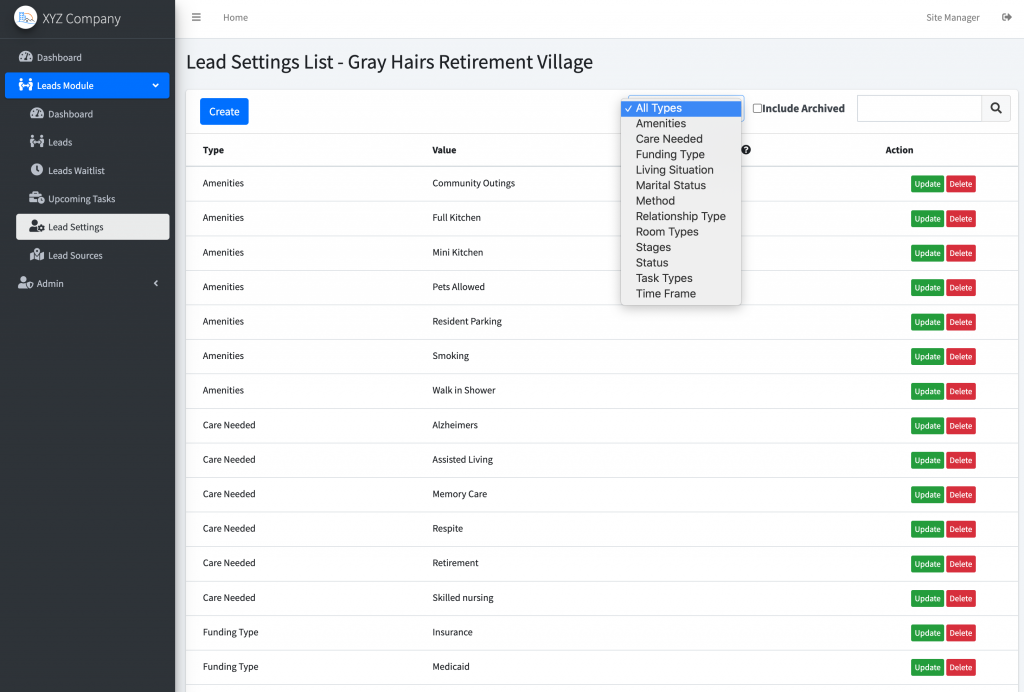
Welcome to the Lead Settings page in MyResidentCare! This page allows you to configure various dropdown options used in managing leads and lead tasks. Customizing these settings is essential for tailoring the software to your specific needs and streamlining lead and task management.

Lead Setting Categories
The Lead Settings page provides customization options for the following categories:
- Amenities: Configure the amenities or features that your assisted living or long-term care facility offers.
- Care Needed: Define the different levels of care required by prospective residents.
- Funding Type: Specify the funding sources available to residents (e.g., private pay, Medicaid, Medicare).
- Living Situation: Describe the various living arrangements available (e.g., independent living, shared apartment, private room).
- Marital Status: Set the marital status options for leads.
- Method: Define the methods through which leads are acquired (e.g., email, mail, phone).
- Relationship Type: Categorize the relationship of the lead contact to the prospective resident (e.g., family, friend, self).
- Room Types: Customize the types of rooms or accommodations available.
- Stages: Configure lead stages to track their progress through the lead management process.
- Status: Define the lead status options to classify their current status in your facility’s pipeline.
- Task Types: Specify the types of tasks or activities that can be associated with leads.
- Time Frame: Set the time frame for how quickly the contact is needing a place for the lead to move in. This option is vital for managing leads with a sense of urgency, allowing you to prioritize and respond promptly.
Customizing Settings
To customize these settings:
- Adding New Options:
- To add a new option, navigate to lead settings, and click on the “Create” button.
- Fill in the details and save the new option.
- Editing or Modifying Existing Options:
- To edit an existing option, find the item you wish to modify and click on the “Update” button.
- Make the necessary changes and save your edits.
- Removing Options:
- Some categories may allow you to remove options. To do this, locate the item you want to delete and click on the “Delete” option.
Protected Stages
Please note that some stages are protected and cannot be removed. These protected stages are vital for the software to move leads through critical stages of the lead management process. The protected stages include:
- Lead: The initial stage when a lead is first entered into the system.
- Closed: Indicates that a lead is no longer a viable prospect.
- Move-In: Marks the transition to the move-in stage.
- Wait List: Indicates that a lead is placed on a waiting list for future availability.
Filtering Leads
The customized settings, such as Status, Method, and Stage, serve as valuable filters when viewing the lead list. You can filter leads based on these settings to efficiently manage and track your leads.
Best Practices
To make the most of these Lead Settings, consider the following best practices:
- Regularly review and update these settings to align with your facility’s evolving needs.
- Ensure that statuses, stages, and task types accurately reflect your lead management process.
- Train your team on how to use these settings effectively for consistent and efficient lead management.
Conclusion
Customizing the Lead Settings is a fundamental step in tailoring MyResidentCare to your unique requirements. By configuring these options, you can enhance the efficiency of your lead and task management processes and provide a more personalized experience to your residents and prospects.
